Follow Us @jadephotographs

Showing posts with label yummy. Show all posts

July 4, 2015

The bestest most softest chocolate chip cookies

Saturday, July 04, 2015 0 Comments

Seriously the best cookies ever

 I found this recipe and I am never going to use another chocolate chip cookie. Props to Pinch of Yum for the perfect recipe. 


Chocolate chip cookies

Ingredients
  • 8 tablespoons of salted butter
  • ½ cup white sugar (I like to use raw cane sugar with a coarser texture)
  • ¼ cup packed light brown sugar
  • 1 teaspoon vanilla
  • 1 egg
  • 1½ cups all purpose flour
  • ½ teaspoon baking soda
  • ¼ teaspoon salt (but I always add a little extra)
  • ¾ cup chocolate chips (I use a combination of chocolate chips and chocolate chunks)
Directions
  1. Preheat the oven to 350 degrees. Microwave the butter for about 40 seconds to just barely melt it. It shouldn't be hot - but it should be almost entirely in liquid form.
  2. Using a stand mixer or electric beaters, beat the butter with the sugars until creamy. Add the vanilla and the egg; beat on low speed until just incorporated - 10-15 seconds or so (if you beat the egg for too long, the cookies will be stiff).
  3. Add the flour, baking soda, and salt. Mix until crumbles form. Use your hands to press the crumbles together into a dough. It should form one large ball that is easy to handle (right at the stage between "wet" dough and "dry" dough). Add the chocolate chips and incorporate with your hands.
  4. Roll the dough into 12 large balls (or 9 for HUGELY awesome cookies) and place on a cookie sheet. Bake for 9-11 minutes until the cookies look puffy and dry and just barely golden.Warning, friends: DO NOT OVERBAKE. This advice is probably written on every cookie recipe everywhere, but this is essential for keeping the cookies soft. Take them out even if they look like they're not done yet (see picture in the post). They'll be pale and puffy.
  5. Let them cool on the pan for a good 30 minutes or so (I mean, okay, eat four or five but then let the rest of them cool). They will sink down and turn into these dense, buttery, soft cookies that are the best in all the land. These should stay soft for many days if kept in an airtight container. I also like to freeze them.


January 23, 2015

The best Chocolate Chip cookies

Friday, January 23, 2015 0 Comments

 The best Chocolate Chip cookies

2 3/4 c (14.5 oz) all-purpose flour
1 t baking soda
1 t salt
1/2 c (4 oz) unsalted butter at room temperature
1/2 c (4 oz) Crisco (plain or butter flavored, I prefer plain)


1 c (6.5 oz) light brown sugar
1 c minus 2 T (6.5 oz) white sugar
2 large eggs
1 1/2 t vanilla
1 1/2 c (10 oz) semi-sweet chocolate chips (Hershey's brand is best)


Mixing the flour allows the final dough to have an even distribution of ingredients without over-mixing it.
In a small bowl gently mix the flour, salt, and baking soda until the ingredients are evenly distributed.  Set aside.
Using the wire whisk attachment of a stand mixer, cream the butter and shortening on high until light and fluffy, 1-3 minutes.  Beating the butter and shortening gives the dough a better rise in the oven, making the cookies lighter. Butter is good for taste and shortening is good to make the cookie softer.

Add both sugars and beat on high 1-2 minutes. Add eggs and vanilla. Beat until fully incorporated.
Add the chocolate chips and mix gently.
Add the flour mixture and mix until just incorporated.  Do not overmix!


Adding the chocolate chips before adding the flour evenly distributes them without over-mixing the final dough.  Do not over-mix or it will discolor the dough.

The flour to be just incorporated, is the point when you no longer see white spots of flour.  Do not overmix! Over-mixing will ruin the cookies.  They will bake flatter and look greasy.  See the problem section for a picture of a very over-mixed cookie.

Touch test the dough.  It should feel slightly sticky, but not much should stick to your finger.  If it is very sticky add flour 2T (.5 oz) at a time. Using your hands, roll the dough into balls 1.5 inches tall (1.5 oz).  Place on an ungreased cookie sheet 3 inches apart.  Cover and refrigerate 30 minutes or until firm.  You can hold the dough up to two days in the refrigerator or up to six months in the freezer. 

When shaping the cookies, you will know if you have the fat/flour ratio right.
too little flour- it will stick to your hands, forms a messy looking ball
just right- won't stick to your hands, but just barely, forms a smooth ball
too much flour- dough has to be forced into a ball, crumbly dough, rough looking ball
Handle the dough as little as possible while still shaping them properly.
 

 15-20 minutes before baking, position the oven rack to the second highest setting. Preheat the oven to 375.
Remove the dough from the refrigerator and bake 8-10 minutes.  They are ready to come out of the oven when they are domed and puffy, show a few signs of browning and look a bit underdone.
Leave the cookies on the cookie sheet for 2 minutes.

January 21, 2015

Crack cookies

Wednesday, January 21, 2015 0 Comments

COPYCAT LOFTHOUSE SUGAR COOKIES aka: Crack Cookies

INGREDIENTS
3 C flour, divided
1/2 tsp baking soda
1/2 tsp baking powder
1/2 C butter, room temperature
1 C sugar
2 eggs
1 tsp vanilla extract
3/4 C sour cream
FROSTING
1/2 C butter, softened
3 C powdered sugar
1 tsp vanilla
1/2 and 1/2 or milk, just enough to get right consistency
food coloring
sprinkles

INSTRUCTIONS

In a bowl combine 3 C flour, baking soda, baking powder.
In a mixer cream together the butter and sugar at mediumn speed until light and fluffy.
Add in eggs.
Add in vanilla and sour cream and mix on low until combined.
Add in dry ingredients and beat until just combined.
Dough will be sticky.
Wrap in plastic wrap and refrigerate overnight.
Use some additional flour for counter and rolling pin to roll out dough 1/4 inch thick
With a 2 inch round cutter cut out cookies.
Bake at 425 on parchment lined cookie sheet for 6-8 minutes or until the cookie barely turns lightly brown around the bottom edge. Do not overcook these cookies!
Transfer to a rack to cool.

FROSTING
 
Beat together butter, sugar and vanilla until smooth.
Add in just enough milk to get a consistency. Do 1 Tablespoon at a time.
Add food coloring if wanted
Frost cookies and add sprinkles.
Store in an air tight container. Best to let cookies sit for several hours before serving.


Queso fresca

Wednesday, January 21, 2015 0 Comments

 Making Queso Fresca


We start by heating a gallon of whole milk in a pot, stirring more or less constantly, and watching the temperature on my thermometer. It's easy to scorch the milk at this stage, which will give your cheese an acrid, bitter flavor, so use a heavy-bottomed pot if possible and stir gently and constantly.
When the milk has reached anywhere from 165°F to 185°F, I take it off the heat. 

Next, add the acid. We used lemon juice, but vinegar would also work in its place—it all comes down to the kind of flavor you're looking for. Lemon juice will add a citrus tang to the cheese, whereas distilled vinegar will leave you with a more neutral flavor.
Working one tablespoon at a time and stirring gently after each addition, we continue pouring in the acid until the curds separate from the whey. It will look like soft, curly white clumps suspended in a clearish liquid, and it will be sudden. 

Once they've separated, take a break. Let the pot sit uncovered for at least five minutes and up to 20 minutes to complete the separation process.
Ladle the curds into a cheesecloth-lined colander.
Allow the curds to strain for a good 20 minutes for pressed cheese, or a full hour for fresh curds. To salt the cheese, sprinkle a quarter teaspoon of salt over the curds and gently stir it in.
For pressed cheese, gather the curds into a ball in the middle of your cheesecloth and press them into a hockey-puck shape.
Then, tie the cloth around the cheese, place bound cheese back into the colander, and put some kind of weight on top— like use a small plate weighed down by a large mason jar of water, but several cans of food would work, or really anything that weighs a few pounds.
Let your set-up rest for an hour and a half, or until the cheese has reached your preferred texture—the longer you wait, the firmer it will get. It'll keep for up to a week in the refrigerator, but it's best used right away.

It turned out pretty tasty. So good with anything mexican or Latin inspired. 

November 27, 2014

Pecan Sweet Potato Casserole

Thursday, November 27, 2014 0 Comments
Pecan Sweet Potato Casserole
 
This was so delicious. I would recommend it to everyone. Even if you don't like sweet potatoes, give it a try you will convert to sweet potatoism! Yup I just made that word up. 


Add caption


Ingredients
  • 3 cups sweet potatoes
  • ½ cup sugar
  • ½ cup butter, softened
  • 2 eggs, lightly beaten
  • 1 teaspoon vanilla
  • ⅓ cup milk
Topping
  • ⅓ cup butter, melted
  • 1 cup brown sugar
  • ½ cup flour
  • 1 cup chopped pecans
Instructions
  1. Boil and mash sweet potatoes.
  2. Beat in sugar, butter, eggs, vanilla and milk until smooth and creamy.
  3. Put in 9x13 greased pan.
  4. To make topping, combine topping ingredients together in a small bowl. Stir and mix to combine. Crumble topping over sweet potatoes.
  5. Bake at 350 for 30 minutes.

April 11, 2013

Slow Cooker Cashew Orange Chicken

Thursday, April 11, 2013 0 Comments
Cashew Orange Chicken 

Ingredients:

2 lbs boneless skinless chicken breasts (About 4 pieces)
1/4 cup all purpose flour
1/2 tsp black pepper
1 Tbsp canola oil
1/4 cup soy sauce
2 Tbsp rice wine vinegar
2 Tbsp ketchup

juice of one orange
1 Tbsp Honey
1 Tbsp brown sugar
1 garlic clove, minced
1/2 tsp grated fresh ginger
1/4 tsp red pepper flakes
1/2 cup cashews


1.Combine flour and pepper in resealable food storage bag. Add chicken. Shake to coat with flour mixture. 
2. Heat oil in skillet over medium-high heat. Brown chicken about 2 minutes on each side. Place chicken in slow cooker.
3. Combine soy sauce, vinegar, ketchup, orange juice, honey, sugar, garlic, ginger, and pepper flakes in small bowl; pour over chicken. 
4. Cook on LOW for 2-3 hours. Add cashews and stir. 
5.Serve over rice. 


April 8, 2013

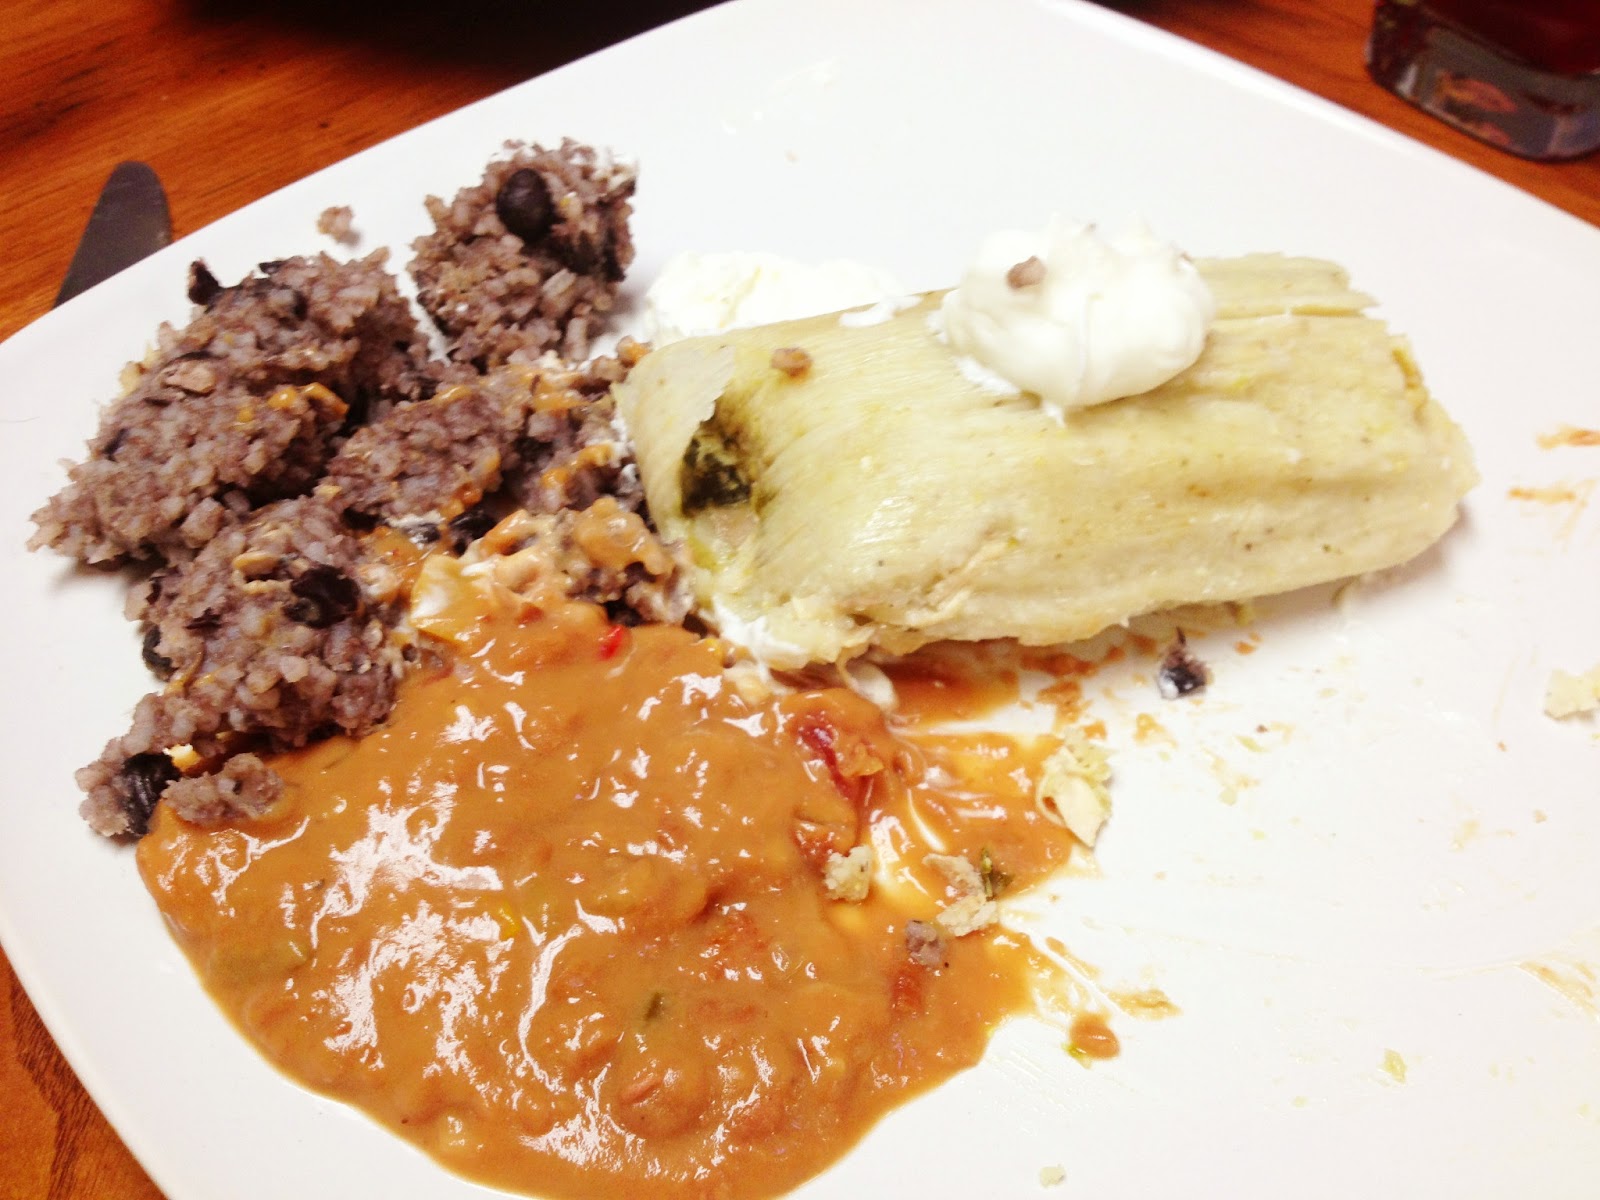
Tamales de Pollo Verde

Monday, April 08, 2013 0 Comments
Tamales de Pollo Verde

Filling

  • 1 8-ounce package dried corn husks
  • 1 pound tomatillos, husked, rinsed
  • 2 Jalapenos chopped
  • 4 large garlic cloves, chopped
  • 1 1/2 tablespoons olive oil
  • 2 cups low-salt chicken broth
  • 4 cups (packed) coarsely shredded cooked chicken
  • 2/3 cup chopped fresh cilantro

Dough

  • 1 1/3 vegetable shortening
  • salt (to taste)
  • 1 1/2 teaspoons baking powder
  • 4 cups freshly ground masa dough for tamales (34 to 36 ounces)
  • 2 cups (about) low-salt chicken broth
  • garlic salt (to taste)
  • cumin (to taste)

Preparation

For filling:

Place husks in large pot or large bowl; add water to cover. Place heavy plate on husks to keep submerged. Let stand until husks soften, turning occasionally, at least 3 hours and up to 1 day.
Preheat broiler. Line heavy baking sheet with foil. Arrange tomatillos on prepared sheet. Broil until tomatillos blacken in spots, turning once, about 5 minutes per side. Transfer tomatillos and any juices on sheet to processor and cool. Add jalapenos and garlic to processor and blend until smooth puree forms. Heat oil in medium saucepan over medium-high heat. Add tomatillo puree and boil 5 minutes, stirring often. Add broth. Reduce heat to medium; simmer until sauce coats spoon thickly and is reduced to 1 cup, stirring occasionally, about 40 minutes. Season with salt. Mix in chicken and cilantro. (Can be made 1 day ahead. Cover and chill.) 

For dough:

Making the dough is a little tougher. It's really about feel. You want it to be almost sticky. So I dump the masa out on the counter I add the seasonings I want to taste then alternate chicken broth & vegetable oil. Massaging the dough together to form a soft ball. You want it to stick together really well. If you make a ball and flatten it and there are no cracks you have achieved the right consistency. It does take practice.


Fill bottom of pot with steamer insert with enough water (about 2 inches) to reach bottom of insert. Line bottom of insert with some softened corn husks. Open 1 large husks on work surface. Spread  a handful of  dough in the center of the husk, leaving 2- to 3-inch plain border at narrow end of husk. Spoon heaping tablespoon filling in strip down center of each dough square. Fold long sides of husk and dough over filling to cover. Fold up narrow end of husk, leaving wide end of tamale open. Stand tamales in steamer basket. Repeat with more husks, dough, and filling until all filling has been used. 
Bring water in pot to boil. Cover pot and steam tamales until dough is firm to touch and separates easily from husk, adding more water to pot as necessary, about 45 minutes. Let stand 10 minutes. (Can be made 2 days ahead. Cool 1 hour. Cover and chill. Before serving, re-steam tamales until hot, about 35 minutes.)
Freeze leftovers for later. 
YUMMY!!!


April 1, 2013

The best banana bread

Monday, April 01, 2013 0 Comments

The Best Banana Bread


Ingredients

1 1/4 cup ripe bananas, mashed
1 teaspoon lemon juice
1 3/4 cup flour
1 cup sugar
1 1/2 teaspoons baking soda
1/2 teaspoon salt
1/2 cup brown sugar, packed
2 eggs
1/3 cup buttermilk
1/4 cup oil
1/4 cup apple sauce
2 teaspoons vanilla extract
1 cup chopped walnuts

Directions

1. Preheat oven to 350 degrees and prep a loaf pan by greasing it.
2. In a small bowl, use a fork to finely mash bananas (I used 3). Stir in lemon juice and set aside.
3. In a large bowl, sift flour, sugar, baking soda and salt together. Stir in brown sugar.
4. In another bowl, use a whisk to combine eggs, buttermilk, oil, applesauce and vanilla extract.
5. Pour your liquid ingredients and mashed bananas into the dry ingredients. Use a wooden spoon to stir just until combined.
6. Stir in walnuts or chocolate chips.
7. Pour batter into prepped loaf pan. (If you want, cut a piece of parchment paper to fit the pan, but leave enough to come up over the edges. Once your bread is baked and cooled, you can lift those pieces of parchment paper to easily remove the bread. See photo)
8. Bake bread for about 1 hour. Check the done-ness of your bread by sticking a toothpick or knife into the center. It should come out clean. If it isn't, leave the bread in for more time.
9. Let cool in pan. As always, banana bread is better the next day. Enjoy!


Cherry New york Cheesecake

Monday, April 01, 2013 0 Comments

  Cherry New York Cheesecake 

Ingredients
 
1 crumb-crust recipe, made with finely ground graham crackers below 
5 (8-oz) packages cream cheese, softened  
1 3/4 cups sugar  
3 tablespoons all-purpose flour  
Finely grated zest of 1 orange
Finely grated zest of 1 lemon
5 large eggs
2 large egg yolks
1/2 teaspoon vanilla

preparation
Make crumb crust as directed in separate recipe. Preheat oven to 550°F.
Beat together cream cheese, sugar, flour, and zests with an electric mixer until smooth. Add eggs and yolks, 1 at a time, then vanilla, beating on low speed until each ingredient is incorporated and scraping down bowl between additions.
Put springform pan with crust in a shallow baking pan. Pour filling into crust (springform pan will be completely full) and bake in baking pan (to catch drips) in middle of oven 12 minutes, or until puffed. Reduce temperature to 200°F and continue baking until cake is mostly firm (center will still be slightly wobbly when pan is gently shaken), about 1 hour more.
Run a knife around top edge of cake to loosen and cool completely in springform pan on a rack. Chill cake, loosely covered, at least 6 hours. Remove side of pan and transfer cake to a plate. Bring to room temperature before serving.


Crumb Crust Recipe

  • 1 1/2 cups (5 oz) finely ground graham crackers or cookies such as chocolate or vanilla wafers or gingersnaps
  • 5 tablespoons unsalted butter, melted
  • 1/3 cup sugar
  • 1/8 teaspoon salt
Stir together crust ingredients and press onto bottom and 1 inch up side of a buttered 24-centimeter springform pan. Fill right away or chill up to 2 hours. 


March 14, 2013

Turkey, Mushroom, & Spinach stuffed shells

Thursday, March 14, 2013 0 Comments
Turkey, Mushroom, & Spinach stuffed shells

Ingredients
1 lb Ground turkey
2 c Chopped mushrooms
1 cup spinach
1 box giant pasta shells
1 jar Favorite spaghetti sauce
Fresh basil
Salt-and-pepper to taste
A pinch of garlic salt
A pinch of onion powder
An Italian spice mix; basil, parsley, Oregano
Sour cream
2 cups Mozzarella
Parmesan

Directions

Cook pasta according to box.
Brown the ground turkey, Add the seasonings, Then add the chopped mushrooms and sauté. Add a little olive oil. Then add the spinach and the basil at the end. Remove from pan and chop up till fine.
In a separate bowl mix 1/2 c parmesan cheese and sour cream. Add the meat Mixture and stir together. Put the mixture in a plastic Sandwich bag, Cut the tip and use to fill the shells. In a 9 x 13 pan Add a layer of spaghetti sauce. Then lay the shells in on top. Add More sauce to cover and finally cover with cheese. The more cheese Merrier.


March 12, 2013

Deep Fried Candy Bars

Tuesday, March 12, 2013 0 Comments
If heaven was a food it would be these little gems…
yes these are deep fried mini candy bars. 
So easy to make, you will wish I never gave you the recipe cause you will want to make them all the time.

Deep Fried Candy Bars
mini candy bars – I used snickers and mars bars
tempura batter – bought it at winco
and oil for frying. 
follow package directions for the tempura batter


February 22, 2013

Our First Valentine's dinner date

Friday, February 22, 2013 0 Comments
Cupid's Crazy Cafe
Menu
Apple Juice
Coca Cola
Martinelli's

Proscuitto wrapped Asparagus
 
Steak with Special sauce and grilled potatoes

Orange Chocolate lava cakes

We had such a wonderful valentines day. I am so grateful for such a wonderful husband. I love him so much. I can not believe how blessed I am to have him in my life. Everything happens for a reason, I believe that with all my heart. He is an amazing man and I am the luckiest woman in the world. 

Love you my Husby!!!      


I told Pacer if he had problems finding a gift for me to just go into the store and pick out something red, just not tomatoes. SO he bought me tomatoes, I ate every single one. YUMMY!!!